Mastering Dip Nails at Home: Expert Tips & Guide


Intro
Achieving salon-quality dip nails at home can seem daunting, yet it is an approachable endeavor with the right guidance. As the beauty landscape continues to evolve, many women seek efficient and cost-effective ways to enhance their beauty routine. Dip nails, recognized for their remarkable durability and glossy finish, have surged in popularity. This article serves as a comprehensive roadmap, empowering readers with essential knowledge to replicate professional results from the comfort of their home.
Understanding the basics of dip nails is key. Unlike traditional polish, dip nails utilize a system involving colored powders and a bonding solution, creating a robust layer on each nail. This technique offers longevity, often lasting weeks without chipping. Here, we will commence with the current trends in beauty, particularly focusing on dip nails, ensuring that readers stay informed about the latest developments in their beauty regimen.
Prelude to Dip Nails
Dip nails, a technique that has gained popularity in recent years, offer an interesting alternative to traditional nail applications. This method utilizes a dip powder, coupled with a bonding agent, to create long-lasting, durable nails. Understanding what dip nails entail is crucial for anyone considering this option at home. The process is straightforward but requires attention to detail and the right tools to achieve salon-quality results. With the right guidance, dip nails can become a regular part of your beauty routine.
What Are Dip Nails?
Dip nails are a semi-permanent nail enhancement method. They consist of several layers of a pigmented powder that is applied over a base coat. First, a base coat is brushed onto the nail. Then, the nail is dipped into a colored powder. This process is repeated for additional layers to build the desired thickness and opacity. Finally, an activator is applied to harden the layers, followed by a top coat that gives a glossy finish.
Unlike traditional acrylics, dip nails do not necessitate the use of a UV lamp, making them more accessible for at-home application. The result is often a chip-resistant manicure that can last for weeks with proper care.
Benefits of Dip Nails
The benefits of dip nails extend beyond mere aesthetics. Here are a few key advantages:
- Durability: Dip nails are known for their strength and longevity, typically lasting longer than regular nail polish.
- Quick Application: The application process can be quicker than other methods, which is appealing for those who value time efficiency.
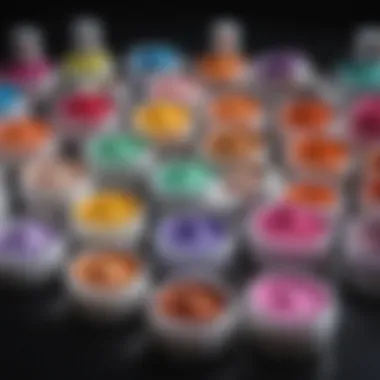
- Variety of Colors: There is a wide selection of colors available in the powder form, allowing for diverse nail art options.
- Less Odor: Many users find that dip powder products have a significantly lower odor compared to traditional acrylic systems.
- Healthier for Nails: When applied correctly, dip nails can be less damaging to the natural nail compared to some other nail enhancements. However, care must be taken to avoid overfilling or improper removal, which can lead to damage.
"Dip nails provide not only a stunning appearance but also a practical solution for those seeking durability in their manicure."
In summary, dip nails present an innovative option for women interested in enhancing their beauty routine. By understanding what dip nails are and their benefits, readers can appreciate why they are a popular choice. In the following sections, we will explore the necessary tools, preparation steps, and the process to apply dip nails at home.
Necessary Tools and Materials
To achieve impressive dip nails at home, understanding the necessary tools and materials is crucial. These elements not only streamline the process but also enhance the final results. Each supply plays an essential role in ensuring that you achieve the desired finish while maintaining nail health. Skipping essential tools can lead to subpar results, so it is important to gather everything before starting.
List of Essential Supplies
Here is a list of the items that you will need for dip nails:
- Nail file: This is needed to shape the nails before application. Choose a fine-grit file for smooth edges.
- Nail buffer: Buffing the nail surface ensures better adhesion of the dip powder.
- Cuticle pusher: Helps push back the cuticles for a clean look before applying dip powder.
- Base coat: This is vital for adhering the dip powder to your nails.
- Dip powder: Choose a high-quality powder based on your desired color.
- Activator: This liquid is important for hardening the dip powder.
- Top coat: Adds shine and seals the dip powder for durability.
- Nail cleanser: Cleans the nails to remove any oils or residues.
- Lint-free wipes: For applying the nail cleanser and wiping between steps.
- Nail brush: Useful for removing excess powder while applying dip nails.


Having all these supplies prepared will ensure a smooth and effective experience when applying dip nails.
Choosing the Right Dip Powder
Selecting the right dip powder is essential for achieving optimal results. When choosing, consider the following factors:
- Quality: Look for brands that are known for their quality and have good reviews. High-quality powders often contain better pigments and adhere well.
- Color selection: There are many shades to choose from. It can be worth testing a few shades to see what works best with your skin tone.
- Formula: Some powders may be more durable or flexible than others. Check if they offer a long-lasting finish or if they chip easily.
- Health considerations: If you have sensitive skin or allergies, ensure the powder is free from harmful chemicals like formaldehyde. Many brands now offer hypoallergenic options.
Remember, the right dip powder can contribute significantly to the longevity and appearance of your nails. It's important to invest time in choosing a product that aligns with your requirements and expectations.
Preparation Steps Before Application
Preparing for the application of dip nails is a vital step that significantly influences the overall outcome. This phase involves ensuring that both your nails and your workspace are in optimal condition. Proper preparation enhances the longevity of the nails and reduces the likelihood of mistakes during application.
Nail Care Routine
Before applying any dip nails, it is crucial to establish a nail care routine. This routine helps to ensure the health and integrity of your natural nails, which in turn supports a more successful dip nail application. Here are some steps to consider:
- Cleaning: Start by washing your hands thoroughly. This removes dirt and oils that could interfere with the adhesion of the dip product.
- Trimming and Shaping: Use nail clippers to trim your nails to the desired length. A file can help shape them to prevent any unwanted breaks.
- Cuticle Care: Gently push back your cuticles using a cuticle pusher. You may also consider using cuticle oil to nourish the nail area. Avoid cutting cuticles as it can lead to infections.
- Buffing: Lightly buff the surface of each nail using a nail buffer. This creates a textured surface that enhances bonding between the dip powder and the nail.
Regular care leads to healthier nail growth and a smoother application process. Additionally, maintaining your nails can prevent common issues such as peeling, cracking, and brittleness.
Creating a Suitable Workspace
A clutter-free workspace is essential when preparing to apply dip nails. This not only allows you to stay organized but also minimizes distractions, making the process easier and more efficient. Here are some tips for setting up your workspace:
- Choose a Flat Surface: Use a sturdy table or desk where you have enough space to lay out all your materials. Make sure the surface can withstand spills or scratches.
- Gather Your Supplies: Collect all necessary tools and materials beforehand. This includes dip powders, base and top coats, an activator, a nail file, and other essentials. Having everything within reach prevents interruptions.
- Ensure Good Lighting: Adequate lighting is important for precision when applying dip nails. Natural light is best, but if that’s not available, opt for bright white bulbs.
- Use a Protective Cover: To avoid damaging the surface, consider using an old towel or a plastic sheet. This makes cleanup easier and keeps your workspace neat.
Step-by-Step Process for Applying Dip Nails
The application of dip nails requires a meticulous process to achieve results that mirror professional salon work. This section focuses on the essential steps you must follow to ensure a perfect application. Each step builds on the other, and any inconsistency can impact the final look. Therefore, understanding these processes not just enhances the aesthetics of your nails but also ensures their longevity and durability.
Applying the Base Coat
To begin the dip nails process, applying the base coat is critical. The base coat acts as the foundation for the dip powder, promoting adhesion and ensuring that the subsequent layers bond effectively. Start by selecting a high-quality base coat designed specifically for dip nails. Using a brush, apply a thin, even layer to each nail. Be sure to avoid contact with the cuticles, as this can lead to lifting or peeling. After application, it is advisable to hold the finger downward to prevent flooding and dripping, this will allow for smoother application.
Dipping the Nails


The dipping phase transforms the base coat into a vibrant nail color. After allowing the base coat to dry slightly, it’s time to immerse your nails into the dip powder. Choose a shade that resonates with your style. Submerge your nails into the powder at a slight angle to ensure full coverage. After a brief dip, gently shake off any excess powder. It’s essential to repeat this step for each nail to create a uniform and opaque color. If needed, you can also build layers by repeating the process, allowing each layer to dry in between. This construction will add more depth and richness to the color.
Applying the Activator and Top Coat
Following the dipping, the next step is crucial for securing the dip powder onto your nails. The activator solution is necessary as it hardens the powder layer, ensuring durability. Apply a generous layer of activator on each nail, making sure to cover the entire surface but avoiding skin contact. Allow it to dry completely. After the activator has dried, proceed with the top coat. This final layer seals the color and adds a glossy finish. Use swift strokes to cover each nail, and allow enough time for it to cure properly for optimal shine and longevity.
Finishing Touches
Finishing touches finalize the dip nails process and determine the overall look. First, use a nail file to shape the edges if necessary. This step gives your nails a professionally manicured appearance. Next, you can polish the surface with a buffing block to achieve additional shine. In some cases, applying cuticle oil helps in moisturizing the surrounding skin and enhances the appearance of your dip nails. Remember that care and precision during these finishing touches contribute greatly to the overall satisfaction with your dip nails.
Best Practices for a Flawless Finish
Achieving dip nails at home is an art that requires attention to detail. Following the best practices can enhance the final result and extend the longevity of your manicure. These practices ensure that your dip nails not only look good but also stay intact for weeks. Understanding these elements aids in minimizing the risk of common pitfalls encountered during the application process.
Avoiding Common Mistakes
Several common mistakes can mar the quality of your do-it-yourself dip nails. One frequent error is not properly prepping your nails. If you skip the nail care routine, you may encounter issues such as chipping and peeling. Make sure to clean the nail surface thoroughly and push back cuticles to create a clean foundation.
Another mistake involves using too much base coat. Applying an excess amount can lead to uneven application and running of the dip powder. Instead, aim for a thin and even coat to ensure that the dip adheres properly.
Also, many enthusiasts make the mistake of rushing the application process. Each layer, whether it’s the base, dip, or top coat, needs time to dry adequately. Not allowing sufficient drying time can lead to a compromised finish, such as bubbling or lifting. Patience in these stages is key.
- Key Points to Avoid Common Mistakes:
- Prepare nails before application.
- Use a moderate amount of base coat.
- Allow proper drying time between layers.
Tips for a Long-Lasting Application
To ensure that your dip nails have a long-lasting effect, consider these helpful tips. First, choose high-quality dip powder. Quality brands often contain fewer harmful chemicals, which means they are less likely to weaken or damage your nails.
Hydration is also essential. Keeping your nails and cuticles moisturized can prevent breakage and promote overall health. Using a cuticle oil regularly can assist in maintaining your nails post-application.
Moreover, be mindful of exposure to water. Prolonged contact can weaken the bond of the dip nails. Wearing gloves while doing dishes or cleaning can significantly prolong the life of your manicure.
Finally, gentle filing and buffing can help maintain the smoothness of your dip nails. Regular upkeep will support the appearance and durability of your nails.


- Essential Tips for Longevity:
- Select high-quality dip powder.
- Keep nails and cuticles well-moisturized.
- Limit prolonged water exposure.
- Engage in gentle maintenance through filing and buffing.
Post-Application Care and Maintenance
Post-application care and maintenance is vital for ensuring the longevity and appearance of dip nails. Once the application is complete, several factors can determine how well the nails hold up over time. This section will discuss essential care practices as well as indicators for when to refine or remove dip nails. Proper maintenance not only preserves the beauty of the nails but also contributes to overall nail health.
How to Care for Dip Nails
Caring for dip nails requires mindfulness and a gentle touch. Here are some practices to keep them looking their best:
- Moisturize Regularly: Despite their durable finish, dip nails can still be prone to dryness. Use cuticle oil or a hand moisturizer to keep the surrounding skin hydrated. This will prevent the skin from cracking and enhance the overall look of your nails.
- Avoid Excessive Water Exposure: Prolonged exposure to water can weaken the bond between the dip powder and your nail. When washing dishes or bathing, consider wearing gloves to protect your nails.
- Limit Contact with Harsh Chemicals: Certain cleaning products and chemical agents can degrade the quality of dip nails. Always wear gloves when using such products to prevent damage.
- Maintain a Gentle Touch: Avoid using your nails as tools to open packages or perform tasks. This can lead to chipping and lifting of the dip powder, decreasing the lifespan of your manicure.
- Regular Inspections: Periodically inspect your nails for any signs of lifting or damage. Addressing small issues early can prevent bigger problems later.
When to Refine or Remove Dip Nails
Knowing when to refine or remove dip nails is essential for maintaining nail health. Here are signs to look for:
- Visible Lifting: If you notice any lifting at the edges, this is a sign that the nails may need refinement or removal. Ignoring this can lead to further damage to your natural nails.
- Chipping: Those chips can detract from the overall appearance. Once you observe significant chiping, it's typically a good indicator that it is time to refresh your manicure.
- Growth Gaps: As your nails grow, gaps between the dip and the cuticle will become apparent. A touch-up can create a polished look without requiring a full removal.
- Signs of Damage: If your nails begin to feel weak or brittle, reconsider the use of dip powder. Continuing to apply products under these conditions can further compromise your natural nails.
- Duration of Wear: Dip nails can last from three to four weeks at most. To prevent nail damage, it's wise to remove them after this period, allowing your natural nails some time to recover.
End
The conclusion wraps up our exploration of dip nails, emphasizing both the artistry and practicality involved in this beauty technique. Dip nails offer a robust alternative to traditional nail polish, providing durability and a stunning finish. This article has dissected the intricate process of achieving dip nails at home, pointing out each essential step along with the various products required.
By summarizing the fundamental points, readers gain clarity about the methods involved and the care needed afterward. It's vital to acknowledge that applying dip nails is not merely about following steps; it involves understanding the materials, environments, and techniques required to attain salon-quality results.
Moreover, engaging in the process fosters a sense of achievement. Mastering dip nails can boost personal confidence. Ultimately, embracing this DIY aspect allows for exploration of creativity in nail art while enjoying savings compared to salon visits.
"Practice makes perfect, not just in life but also in nail art."
Thus, the conclusion solidifies the essence of the guide — it serves as a practical reference for enthusiasts seeking to enhance their beauty routines, all from the comfort of home.
Summary of Key Points
- Understanding Dip Nails: Dip nails differ significantly from traditional methods, involving the application of colored powder and activators for longevity.
- Essential Tools: A strong emphasis exists on necessary tools and materials, highlighting their role in achieving a successful application.
- Preparation is Key: Preparing nails and workspace properly is crucial for ensuring a smooth process.
- Detailed Application Steps: The step-by-step guide covers everything from applying the base coat to the finishing touches, ensuring clarity in execution.
- Post-Care Importance: Maintenance and care following application are essential to prolong the beauty of dip nails.
Encouragement for Experimentation
Experimentation is at the heart of nail art. While this guide provides a solid foundation, creativity should always be encouraged. Trying different colors, designs, and even combining techniques can lead to unique and personalized results.
For those hesitant to stray from the basics, remember that every professional started as a beginner. Small adjustments in technique or changes in colors can lead to significant transformations. Additionally, utilizing resources such as online communities can offer inspiration and support.
By allowing yourself the freedom to explore, you not only enhance your skills but also cultivate a deeper appreciation for the art of nail application. Embrace the learning journey, and don’t be afraid to express your personality through your nail designs.


